經過前輩的指導以及重新看了一下technet 文章後已經可以依照該文章說明來建立一台Nano Server 虛擬機器。
我的製作過程記錄
使用windows server 2016 tp3 光碟
使用管理者身分啟動powershell ,然後切換到光碟目錄 d:\NanoServer\
該目錄就會有new-nanoserverimage.ps1
New-NanoServerImage –MediaPath D:\ –BasePath C:\Base -TargetPath c:\VM -ComputerName Nano1 -AdministratorPassword (convertto-securestring -string “P@ssw0rd” -asplaintext -force)
–GuestDrivers -Compute -Clustering -Storage –ReverseForwarders -DomainName lab.com
參數說明:
–MediaPath D:\ =>這裡是指光碟內容的根目錄
–BasePath C:\Base => 這裡指定的目錄是說在建立虛擬硬碟時會copy 光碟目錄中的檔案到此目錄
-ComputerName Nano1 => 設定電腦名稱
-AdministratorPassword (convertto-securestring -string “P@ssw0rd” -asplaintext -force)
=> 設定本機Administrator 密碼
-TargetPath c:\VM => 這裡是最後完成的虛擬硬碟存放目錄
-DomainName Lab.com => 加入domain 設定
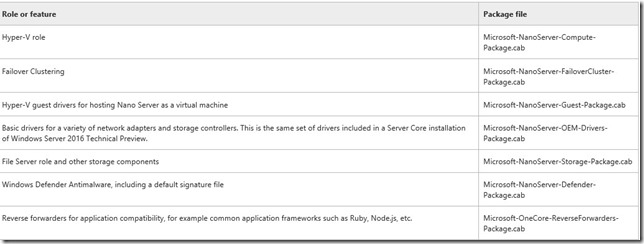
以上三個參數設定後接下來的參數會是安裝的角色目前來說會有
了解相關參數後
在執行該powershell 時有一點一定要注意,因為該powershell 是利用function 方式寫的
通常我們會在該.ps1 目錄下執行 .\xxx.ps1
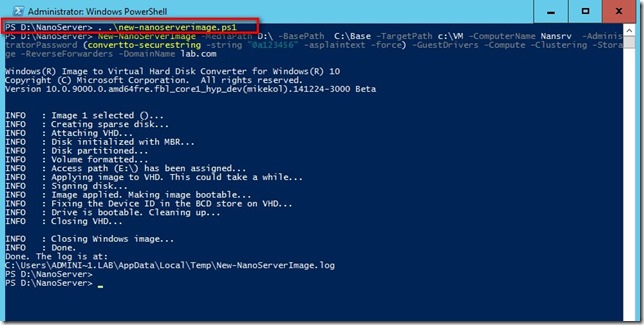
但是在此處必須要執行 .(空格).\new-nanoserverimage.ps1 (如下圖)
在technet 文章有有說明這一段
Start Windows PowerShell as an administrator and change directory to the folder where you’ve placed these scripts and then “dot-source” the New-NanoServerImage.ps1 script (. .\New-NanoServerImage.ps1)
然後在執行該new-nanoserverimage 及後面相關參數才可以
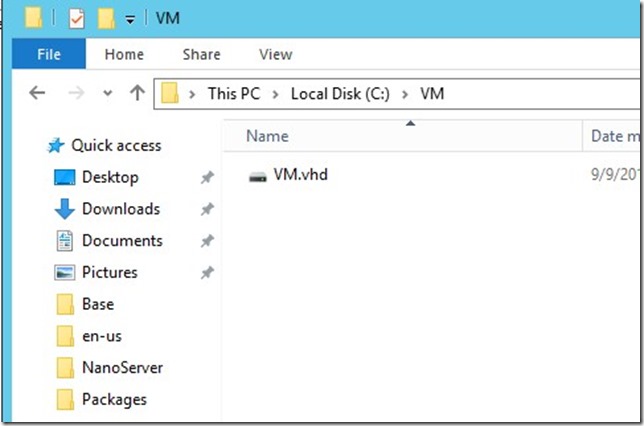
當跑完後再指定的c:\vm 就會有一個vhd
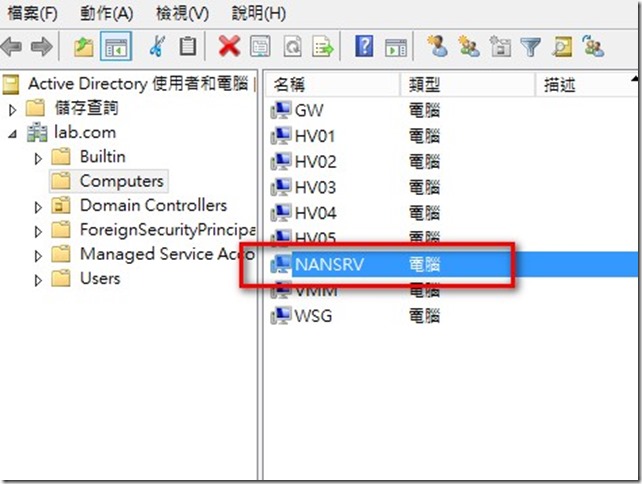
接下來要說明的是因為我是在windows server 2016 tp3 主機執行上面的nanoserver VM建立並該台主機有加入domain (Lab.com),所以在建立好該vhd 後因為有下 join domian 參數所以在DC上就會產生這一台nano server 電腦物件
最後在建立虛擬機器後掛載這個VHD 就可以開始使用了


